

This project is taking longer, but I feel that it will be worth it.
So as normal this week is about the base and this one is the most complicated I have done to date I understand that to some who might be reading this may have done this or more complicated but this is for me is a massive undertaking.
So the idea is something close to karate kid, but a lot more dramatic, so the idea is the monk is standing on a rock in the middle of the ocean wile a storm is happening and even though the world is against him he is still able to find peace.
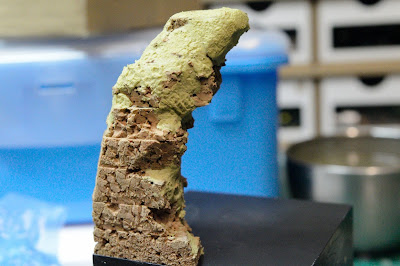
So now the idea is out lets get on with the build starting with the rock make out of cork.


Now the shape of the rock is made I needed to try and make the hole thing more stable as the figure is heavy and the cork is not really the strongest of material so I inserted Lots of brass rods through out miliput


Because I am trying to create something that is a big scene in a small space I thought from the start I would use the back of the rock to be an ending point of the scene to allow people to think about the rest and to use the bottom to make it more sturdy.


With these pics you may or may notice some things that do not make sense and that is because there has been so much going back and redoing this and that because of being unsure about what I was doing and wanting to do it perfect.
Here we have it with a bit of paint.
Here we have it with a bit of paint.


Now this part is an example of something that did not work out like it should the Idea is the cling film would protect the rock/painting from the plaster that I am using to make the water and the waves bit the cling film was did not allow the plaster to cover all the rock so I had to just forget about the paint and just carry on.

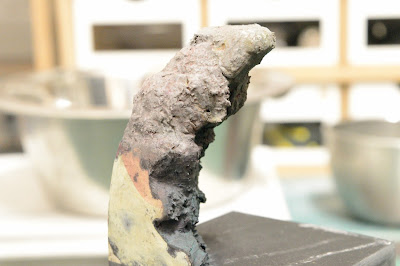
Here we have a first go at making the waves I used filler from Tesco cost £1.


From there I built up the wave up the rock.


And again we hit another point where I had to restart and change something and this was what I was using turns out Filler is not the best thing to use and what happened was first it stuck to the rock like glue and also the home thing did not set in one piece and broke apart which made it useless as I could not even if I wanted to glue it together.
So after chipping away the filler and repainting it (I know I did not have to but I did anyway.) I got plaster not filler and it works a hell of a lot better and I was given the advice to use vaseline on the rock to stop the plaster sticking to it and to use it if filling in mold line but not wanting them to stick together.


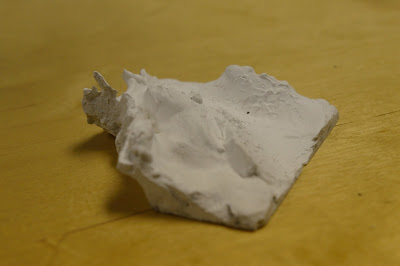
From there building the waves.


As well as filling in gaps and trying to fill the lines, there was a lot more back tracking in these parts with the wave breaking from the water and not being able to slot it back into place, but if I went on about all the things that went wrong then this would be the world longest post.
This comes to the end of it this week, lots more to do.
What you all think and have you done something similar, please comment below.